Use this Arcane Odyssey treasure chart guide to turn an island name, compass direction, distance, elevation, and surface clue into a controlled search. The explanation comes first; when you already have the clue inputs, the Treasure Chart Locator is the faster visual handoff.
Updated September 28, 2026. Chart wording, routes, and reward behavior can change with game updates.
Arcane Odyssey Treasure Chart Guide: How to Read and Solve Charts
Quick answer: how to solve a Treasure Chart
Read the chart in this order: island, direction, distance, elevation, and surface. Select the exact island first. Match the full compass wording, including secondary directions. Choose the distance band literally, then inspect whether the likely area is low, high, coastal, wooded, rocky, or open. Dig in a repeatable line or arc instead of scattering random holes.
Read every clue as a separate filter
| Clue | What it controls | Common mistake | Better habit |
|---|---|---|---|
| Island | The map and all possible terrain. | Starting on a similar-looking island because the coastline feels close. | Confirm the island name before changing any other input. |
| Direction | The wedge or compass sector from the island reference. | Rounding east-northeast to east or southwest to west. | Use the exact 16-point direction shown by the chart and locator. |
| Distance | The inner, middle, or outer search band. | Assuming “halfway” and “on the edge” mean the same thing on a small island. | Change only the distance control when testing a second hypothesis. |
| Elevation | Whether the clue favors low ground, a slope, or a higher shelf. | Searching the correct horizontal zone at the wrong height. | Walk the zone and compare ledges, beaches, paths, and plateaus. |
| Surface | The final terrain check before digging. | Digging through buildings, water, steep rock, or an obvious mismatch. | Use terrain to remove false positives after the map narrows the area. |
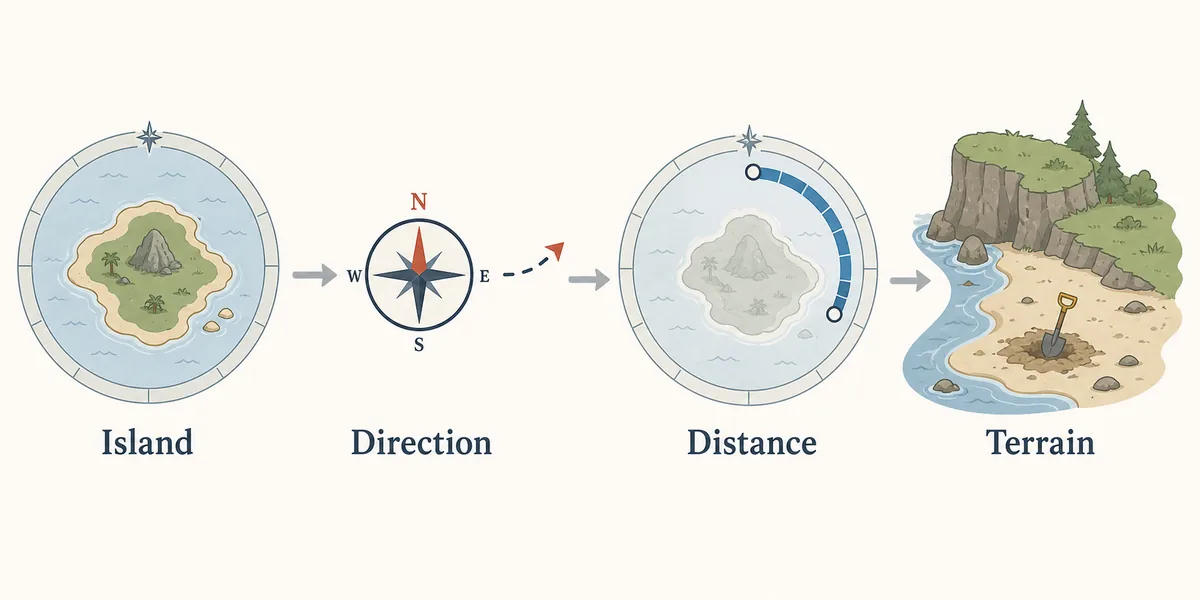
How to use the Arcane Odyssey Treasure Chart Locator
- Open the Arcane Odyssey Treasure Chart Locator.
- Select the island named on the chart. Do not begin with a neighboring island.
- Set the exact compass direction, including diagonal and secondary points.
- Choose the chart’s distance wording: few paces, halfway, or on the edge when those options apply.
- Use the highlighted zone as a starting area, then compare the live terrain with elevation and surface clues.
- Dig a controlled sweep. If the shovel result fails, change one clue interpretation at a time.
The locator is most useful when the inputs are accurate. If the island is wrong, a perfectly drawn wedge is still the wrong wedge. If the direction is rounded, the zone can move toward a different shore. If the distance is wrong, the right direction may still leave you searching too close to the center or too close to the edge.
A practical example of clue solving
Imagine a chart that names Sameria, points east-southeast, says halfway, and mentions higher ground. Start by selecting Sameria and the exact east-southeast control. Choose the middle distance band. Before digging, ignore attractive beaches or buildings that fall outside the band. Walk through the likely zone and look for higher terrain that matches the clue. If the area contains several slopes, test one clean line first and remember which spots you already checked.
If that sweep fails, do not immediately replace Sameria or rotate the direction by a full quarter turn. Re-check whether you used the correct diagonal, whether “halfway” was selected, and whether the clue describes elevation rather than a landmark. The goal is to preserve the clues that are already certain while testing the smallest uncertain variable.
Where to find and farm Treasure Charts
Players usually find charts through exploration and repeatable loot routes. Chests are a practical starting point because they fit naturally into travel loops. Lost cargo, castaways, criminals, rivals, and other encounters can also become useful when they appear along the route you are already running. Treat each source as a chance, not a guaranteed chart-per-minute calculation.
For efficient farming, choose a route you can repeat without losing time to navigation. The Chest Locations Guide helps compare normal chest loops with sealed or dark sealed detours. A route that produces slightly fewer dramatic rewards but keeps you moving may be better than a rare chest detour that breaks the loop every time.
Use familiar islands
Familiar terrain reduces the time spent checking docks, cliffs, and return paths. It also makes it easier to notice when a chart points to an unusual area.
Keep the route flexible
When a chart appears, decide whether to solve it now or finish the current loop. A good route supports both choices instead of forcing a long detour.
What to do when the treasure is not there
A failed dig does not always mean the chart is broken. Use this recovery order:
- Confirm the island name and make sure the page or map is not showing a neighboring island.
- Re-read the full direction. Secondary compass points matter on compact islands.
- Check the distance band and whether the chart says few paces, halfway, or edge.
- Look for a vertical mismatch: a correct area may have a lower beach, upper path, or nearby ledge.
- Remove terrain that does not match the surface wording.
- Only then widen the controlled sweep or revisit the clue interpretation.
Treasure Chart guide versus island guides
This page explains the general method. Named pages are better when the island itself creates repeated confusion. Use the Sameria Treasure Chart Guide for a hub-specific example, the Palo Town Treasure Chart Guide for a compact Bronze Sea island, or the Cirrus Buried Treasure Guide when the search is really about a named buried-treasure task.
Use the Arcane Odyssey Map Guide when you are still deciding between seas or route groups. Use the Shovel Guide when the problem is the tool or its progression rather than the clue itself.
FAQ
How do you solve Treasure Charts in Arcane Odyssey?
Confirm the island, match the exact compass direction, choose the distance, and then filter the zone with elevation and surface clues. Dig in a controlled line or arc and change one uncertain variable at a time.
Where do you find Treasure Charts in Arcane Odyssey?
Start with exploration and chest routes, then add lost cargo, castaways, criminals, and rivals when they fit your route. The exact chance can change, so avoid promising a fixed drop rate.
When should you use the Treasure Chart Locator?
Use it after you know the island, direction, and distance. It narrows the likely zone, while terrain, elevation, and the live game decide the final dig spot.
What does halfway mean on a Treasure Chart?
It means the middle distance band in the locator model. On a small island the bands can look close together, so use terrain and the shovel result instead of judging by visual distance alone.
Why does the locator zone look right but the shovel fails?
Check the exact diagonal direction, distance wording, elevation, and surface. A broad zone can still contain buildings, water, steep rock, or the wrong height.
Can a Treasure Chart have one fixed coordinate?
Do not treat this guide or the locator as a universal fixed coordinate. The useful output is a controlled search area that you verify against the chart and current terrain.
Sources and update note
This guide uses Arcane Tools map assets and a route-based explanation rather than copying a third-party coordinate list. Official game context is linked below; community references are provided for terminology and should be checked again after major updates.